Start by comparing the reference
Open the original photo beside the generated image. Look at the eye contours, nose width, mouth shape and jawline. Then check apparent age, skin tone and accessories. Hair and clothes can change significantly without your wanting every facial feature to change.
Lighting can change how a face appears. Denim daydream uses golden window light; Backstage crush uses flash in a darker setting. The photos below show two visual directions with fictional models, not a before-and-after of one person. To assess your transformation, compare your own reference with your result.
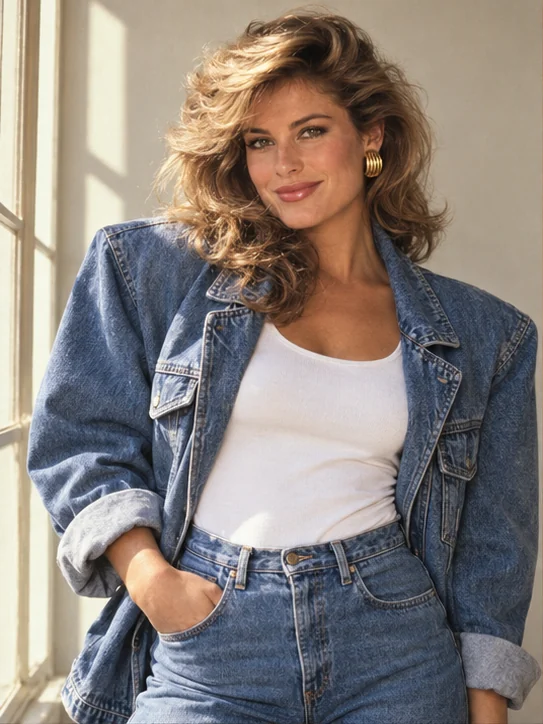
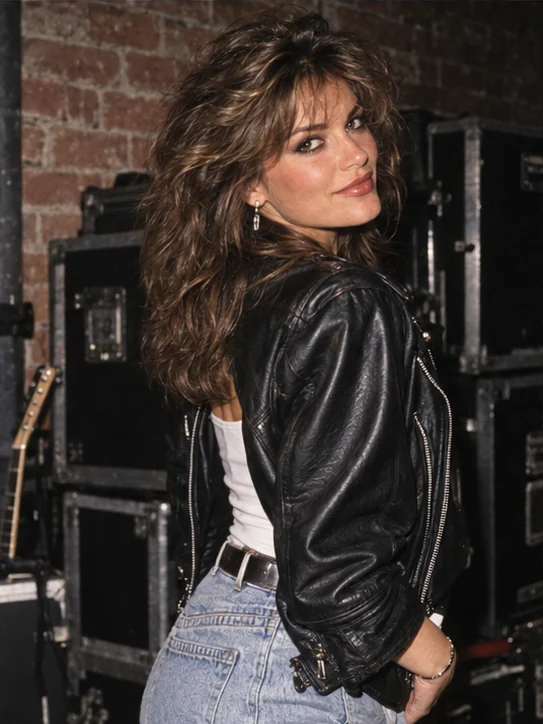
The face looks different
Go back to the original photo instead of repeatedly editing a chain of generated results. Explain which features you want to recover. “Keep my face” is broad; naming a changed eye shape or jawline gives the request more focus.
Copy the suggestion below after attaching the original again. This is a refinement instruction, not a guarantee of perfect preservation. We have not run a separate trial of every correction suggested in this guide.
Use the original photo again as the primary reference. The previous image changed my face shape. Preserve the eye shape, nose width, mouth contours, jawline, apparent age and skin tone of the reference. Keep the 80s clothing and setting, with smaller changes to the face. Generate a natural new version without excessive skin smoothing.
It looks like an 80s costume
Neon, shoulder pads and very tall hair can accumulate until a casual portrait becomes a costume. Pick two or three details you actually want. For an album portrait, simple clothing, studio light and subtle grain already describe a clear direction.
Choose a gallery look that matches the intensity you want. A disco scene can be bolder; a window-light portrait can be softer. Ask to reduce one element at a time while keeping the ones you like.
Reduce the exaggerated styling. I want an everyday portrait from 1985, with simple clothes, moderately voluminous hair and soft light. Remove neon, flashy accessories and intense makeup. Preserve the person in the original reference and use light film texture without a costume-like appearance.
The skin looks plastic or grain hides the eyes
Texture should complement the portrait. If the skin looks plastic, ask for pores and subtle variation without beauty filters. If the grain is heavy, ask for less while keeping the eyes clear. Avoid fixing either extreme by adding several filters at once.
The prompts describe film texture and ask for natural skin and clear eyes. This helps express the intention, but the actual amount of grain depends on each generation.
Adjust only the photographic finish: reduce the grain so the eyes and facial contours remain clear. Preserve natural skin texture without beauty filters, plastic skin or strong sepia. Keep this version’s hairstyle, clothing and composition.
It cropped the hair or returned the wrong format
The collection previews use 3:4 portraits. Story 9:16 requests more height, while Square 1:1 changes the space around the person. Changing the ratio can affect the crop and setting even if the rest of the text stays the same.
Ask for space above the head and a chest-up composition. Check the generated file before cropping for social media; expanding an already cropped image will not necessarily recover the original details.
Recreate this composition in a vertical 9:16 ratio. Keep the whole head visible, leave space above the hair and frame the person from the chest up. Do not stretch or compress the face. Preserve the appearance of the reference person and the style of this version.
When starting again is simpler
If each edit changes something that was previously right, start a new conversation, attach the original and use a shorter prompt. Ask for the overall look first. Then refine only the detail that matters to you.
For couples, check both faces separately and specify which person needs adjusting. Larger groups, extreme angles and partly hidden faces need their own evaluation. The collection previews do not demonstrate that all reference images will produce the same result.
OpenAI’s documentation explains that edits can extend beyond the area selected in the editor. Review the entire image after a change, even if you only asked to replace the clothes or background.